
The commit graph
Every repository you open lands on the commit graph: one row per commit, newest first, with the branch lanes drawn on the left and the refs that point at each commit shown as pills. It is the view you spend most of your time in, and the entry point to everything else — selecting a row opens that commit, and the topmost row is your uncommitted work.
Read your history at a glance
The graph draws one lane per line of development, so a branch that was created, worked on and merged back reads as a single visible curve instead of a flat list you have to reconstruct in your head. Each row carries the author's avatar, the commit subject, the short SHA and the date; branch and tag names appear as coloured pills on the commit they actually point at, which is how you tell where main, your feature branch and your remote have diverged. The sidebar on the left lists the same refs as a tree — branches, tags, stashes, submodules and worktrees — and the topmost graph row is always your working tree, present as soon as you have an uncommitted change.
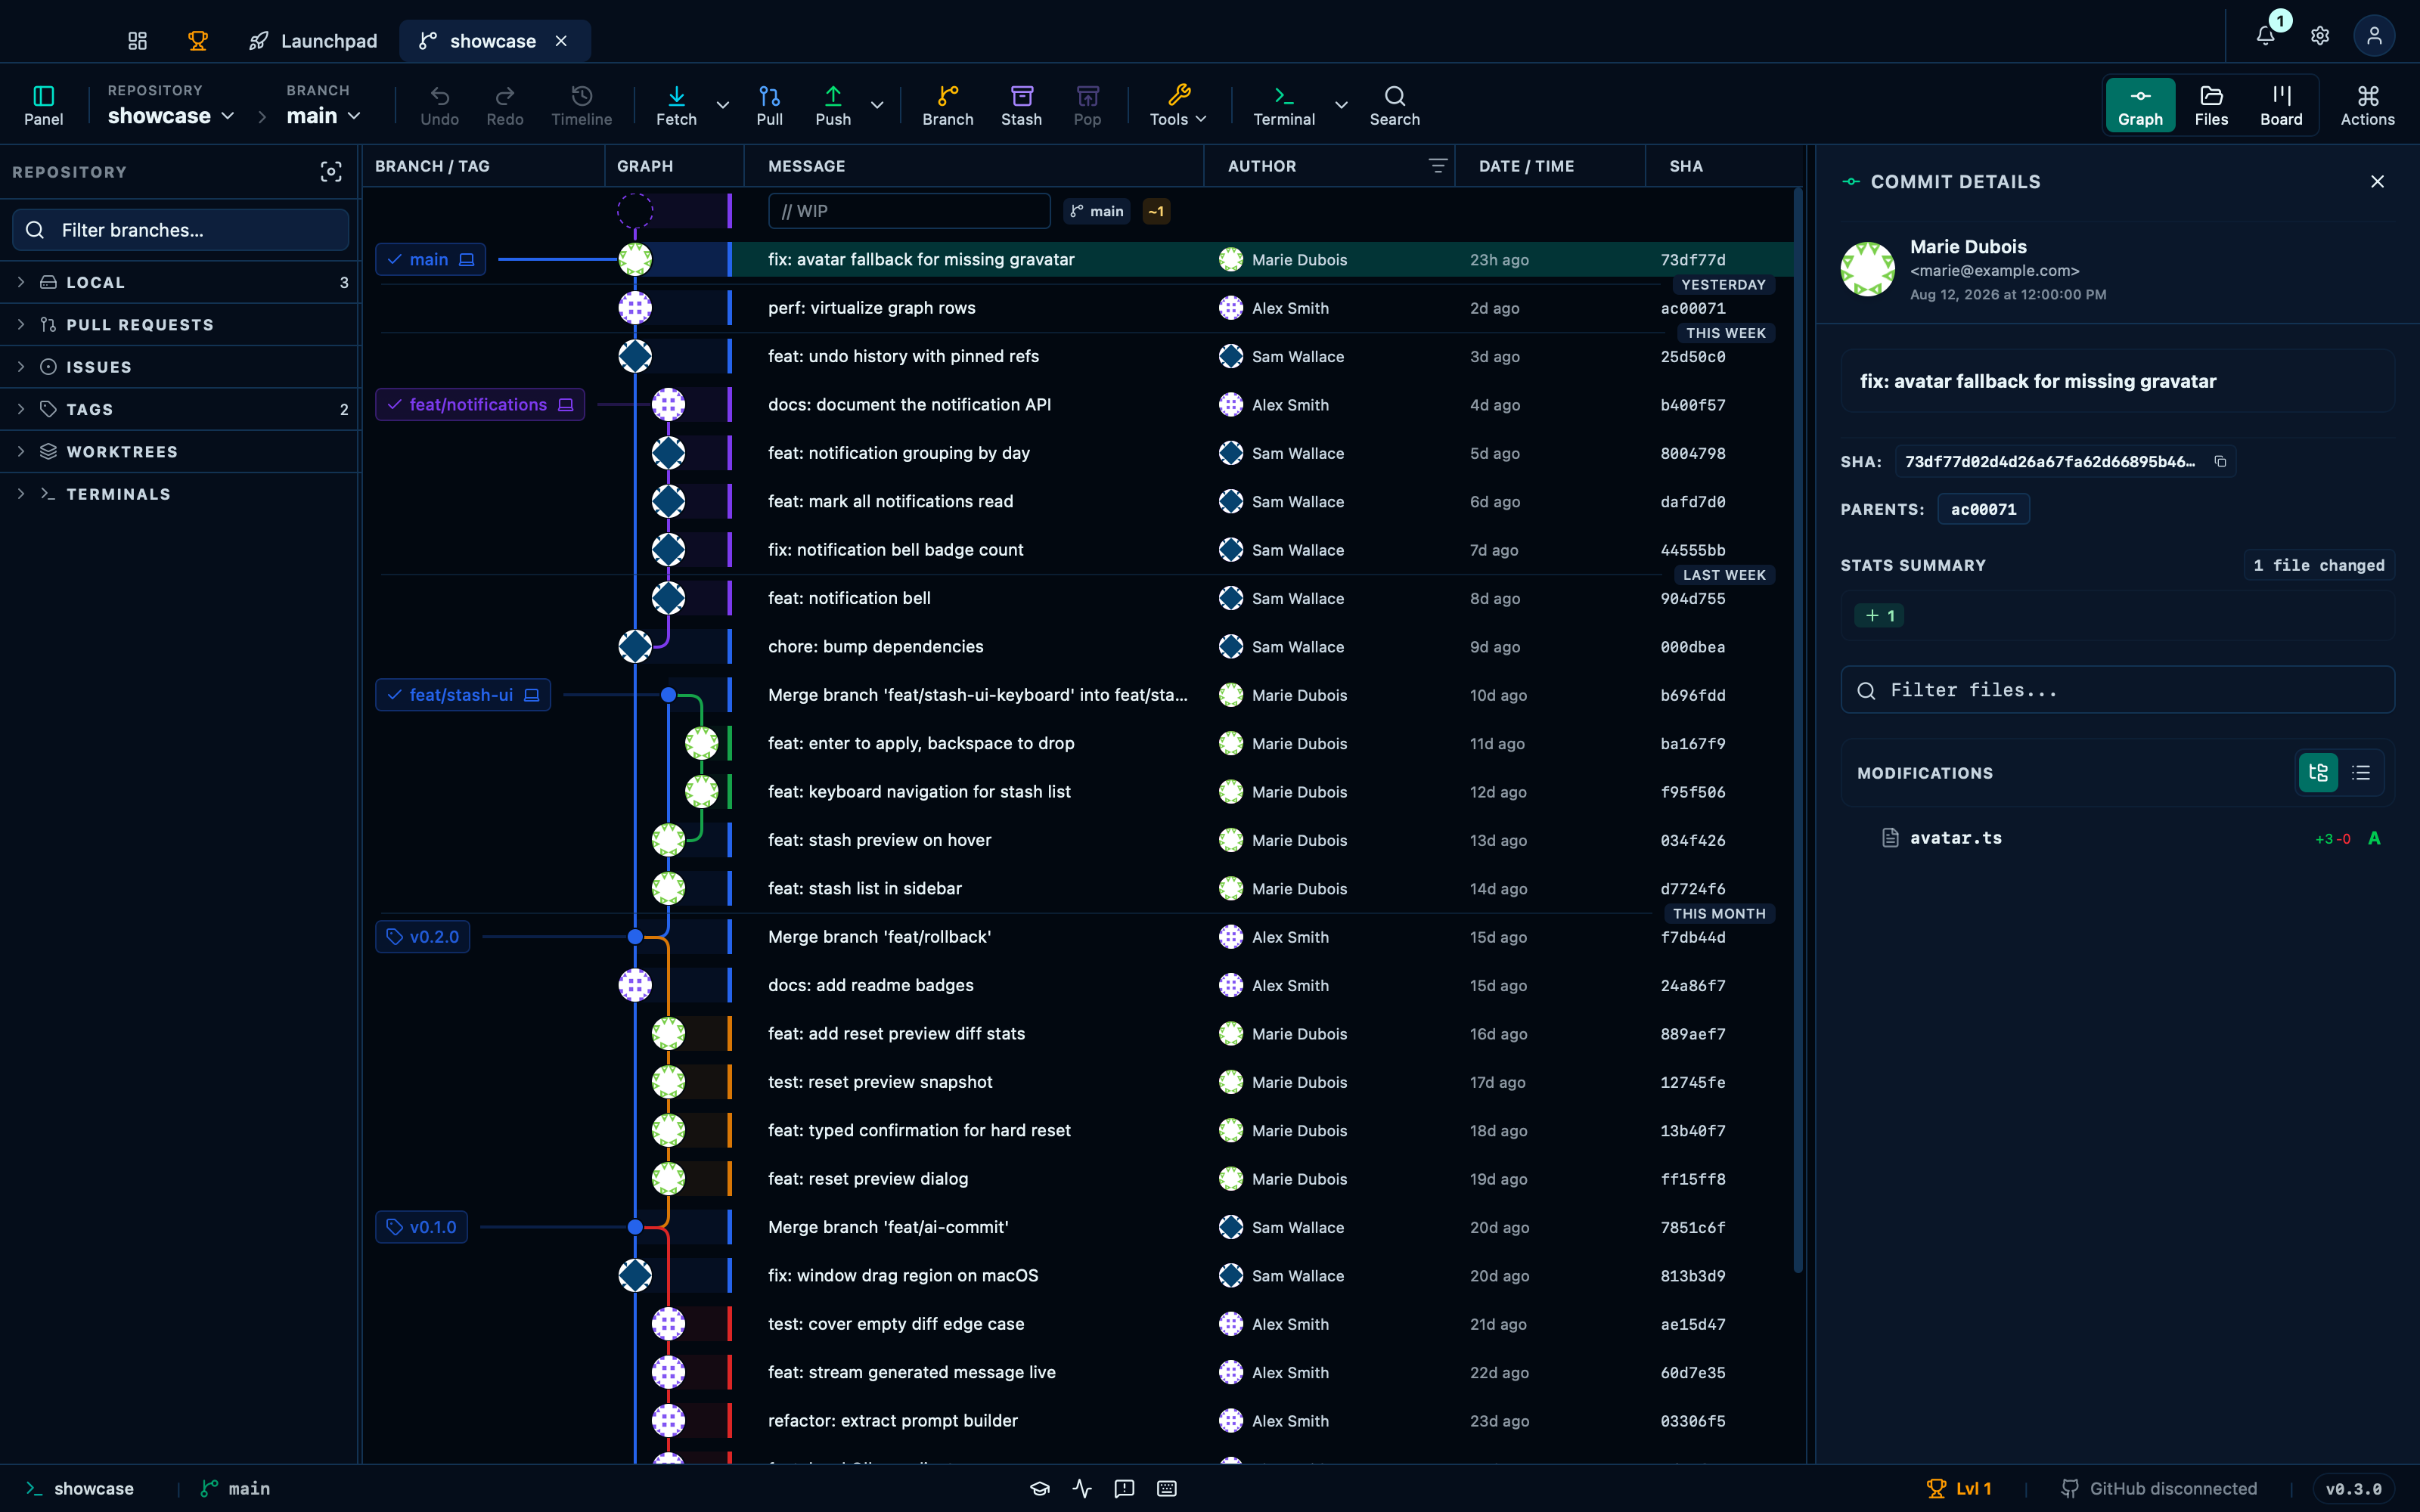
Captured from the running app by this scenario.
You should see
- The commit graph is shown
Hiding a column from the graph header
Right-clicking the header opens a menu of every column, a checkmark against the ones currently shown — hiding one is a click, and bringing it back is the same click again. At least one column always stays visible, so the header can never disappear entirely.
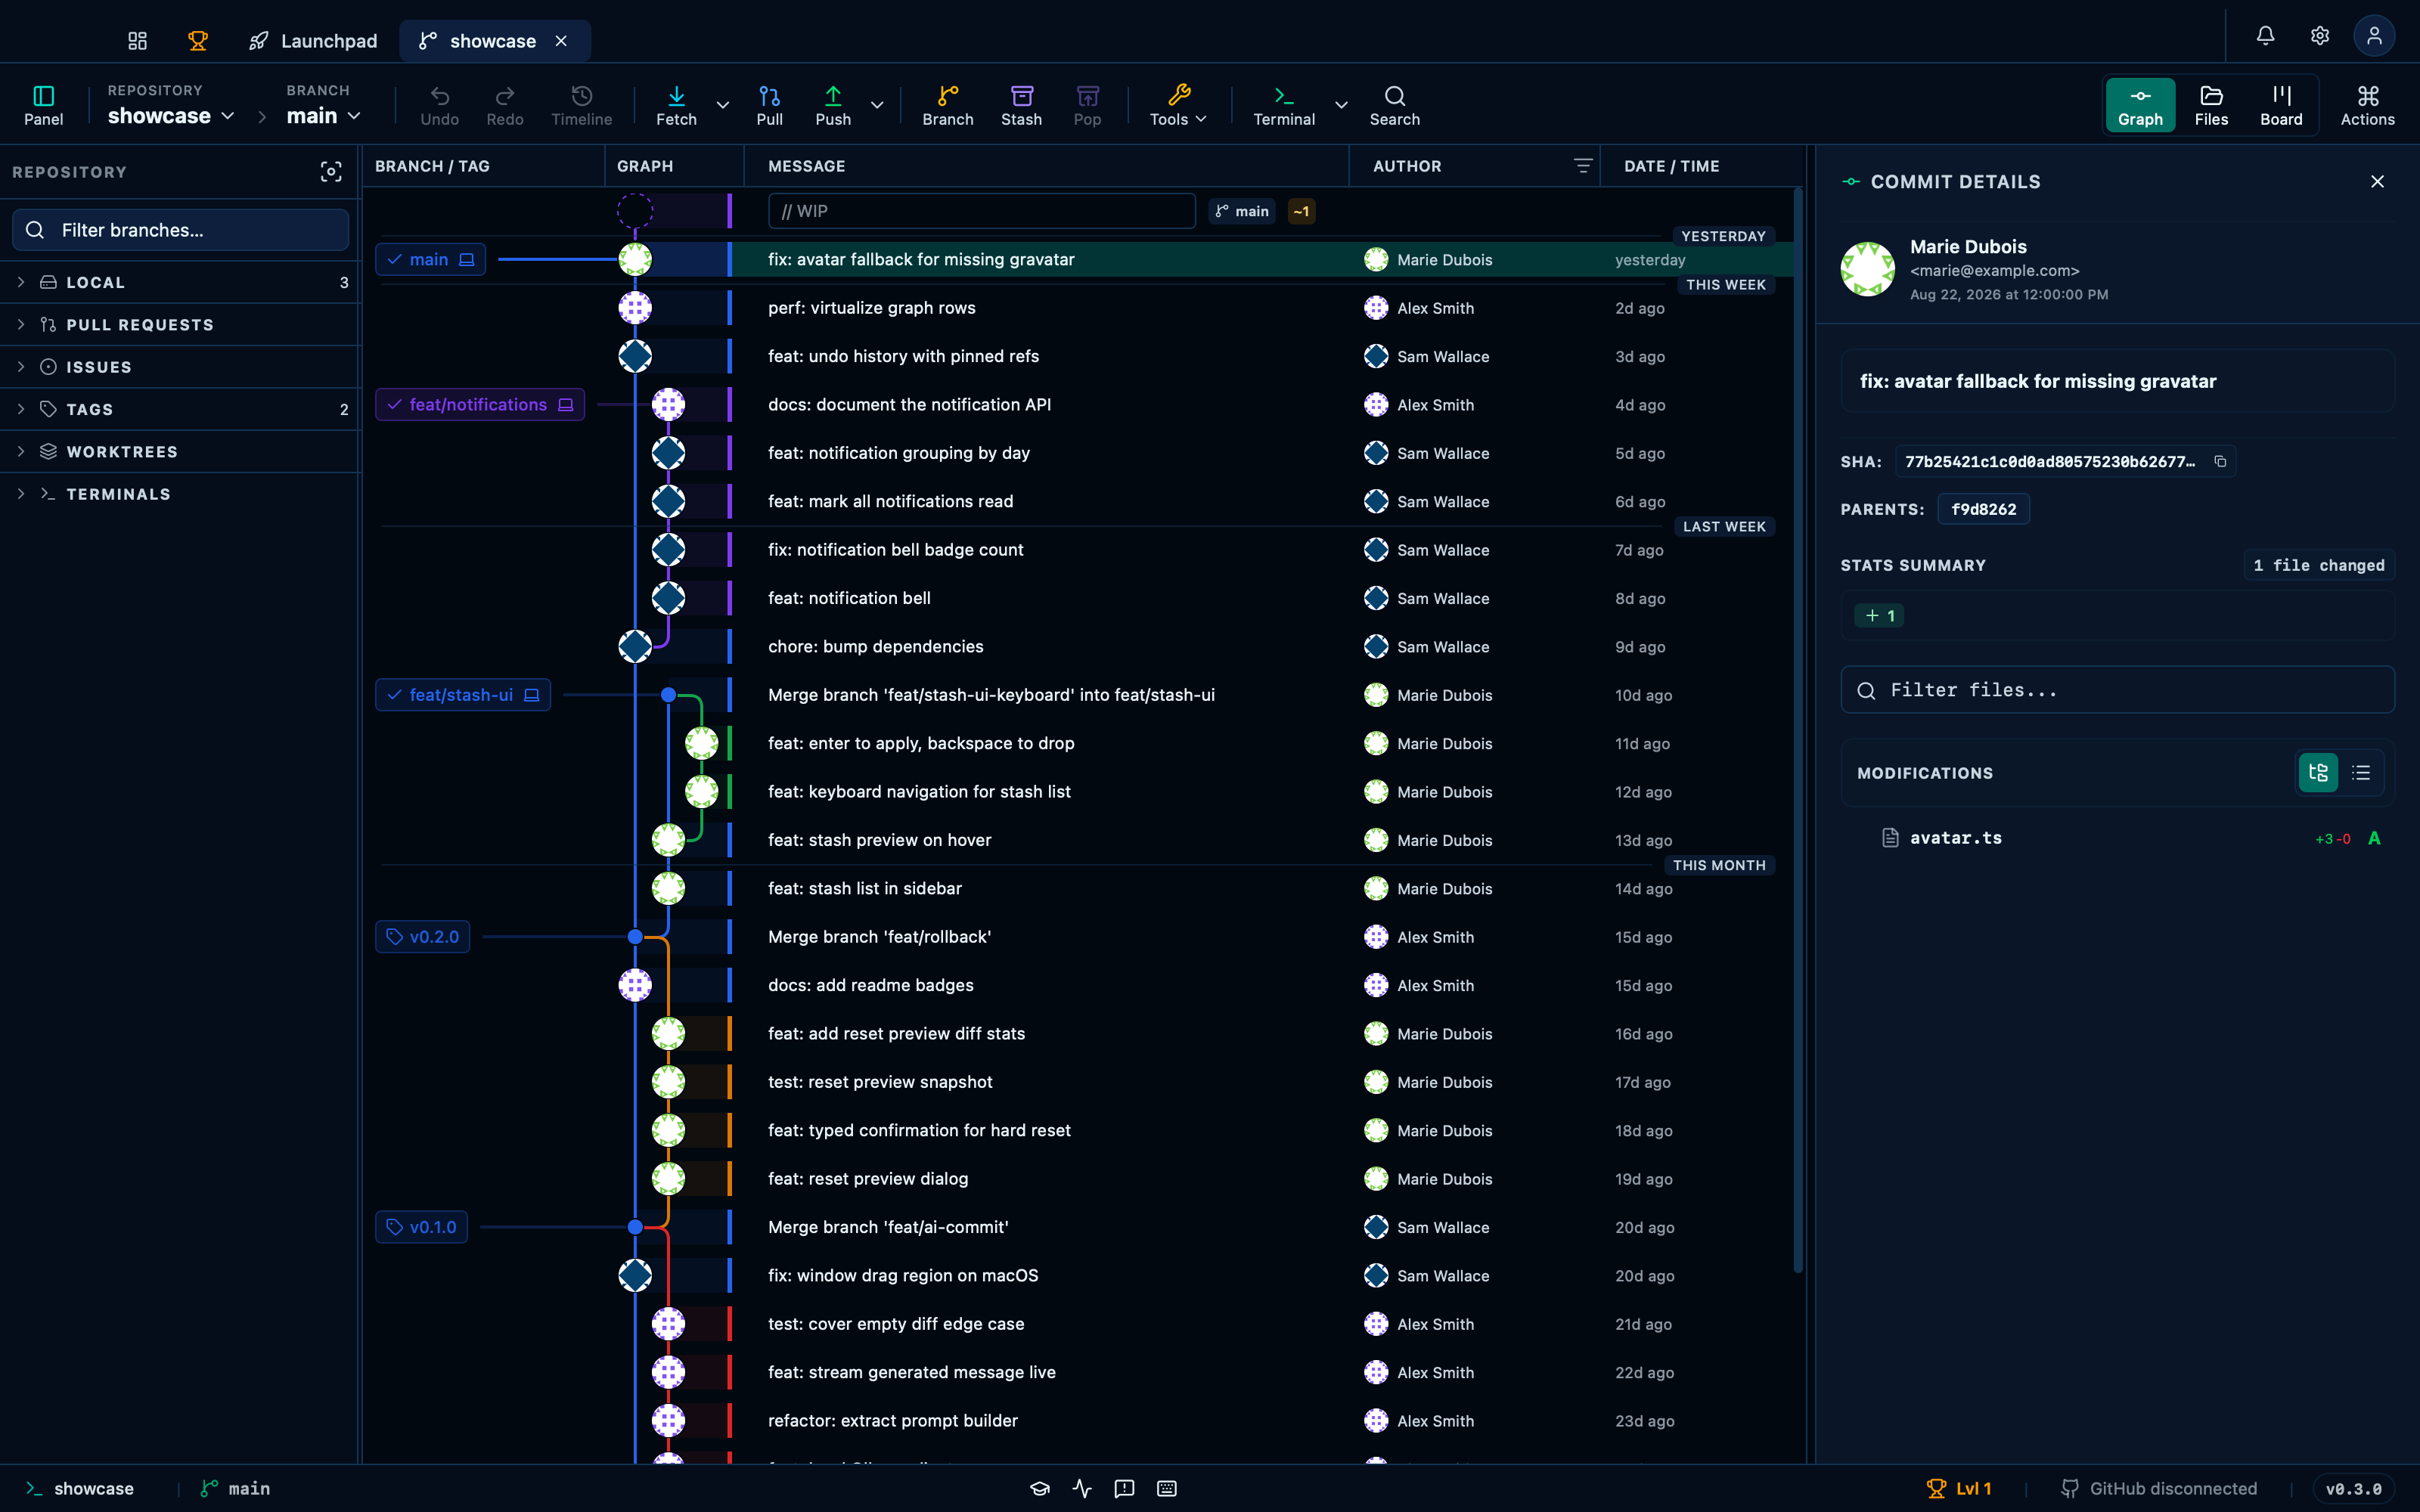
Captured from the running app by this scenario.
Do this
- Right-click the graph header
- Hide the
shacolumn - Right-click the graph header
- Show the
shacolumn
You should see
- The column menu is shown
- The graph header does not show the
SHAcolumn - The graph header shows the
SHAcolumn
Inspect a single commit
Selecting a row opens the commit details panel next to the graph: the full message, the author and committer, the parents, and the list of files the commit touched. Clicking a file in that list shows its diff for that commit alone — so you can answer "what actually changed here?" without leaving the graph or running git show in a terminal. The selection is the anchor for the commit actions too: right-clicking the row offers the operations that make sense for it, such as reverting it, resetting onto it, tagging it or creating a branch from it.
Captured from the running app by this scenario.
Do this
- Select the newest commit in the graph
You should see
- The commit details panel is shown
Selecting several commits shows their combined diff
Cmd-clicking a second row turns the single commit panel into a merged one for the whole selection: the commits listed in order, and one file list for everything they touched between them — a file two of them both edited shows up once, with its net change across the range, not twice.
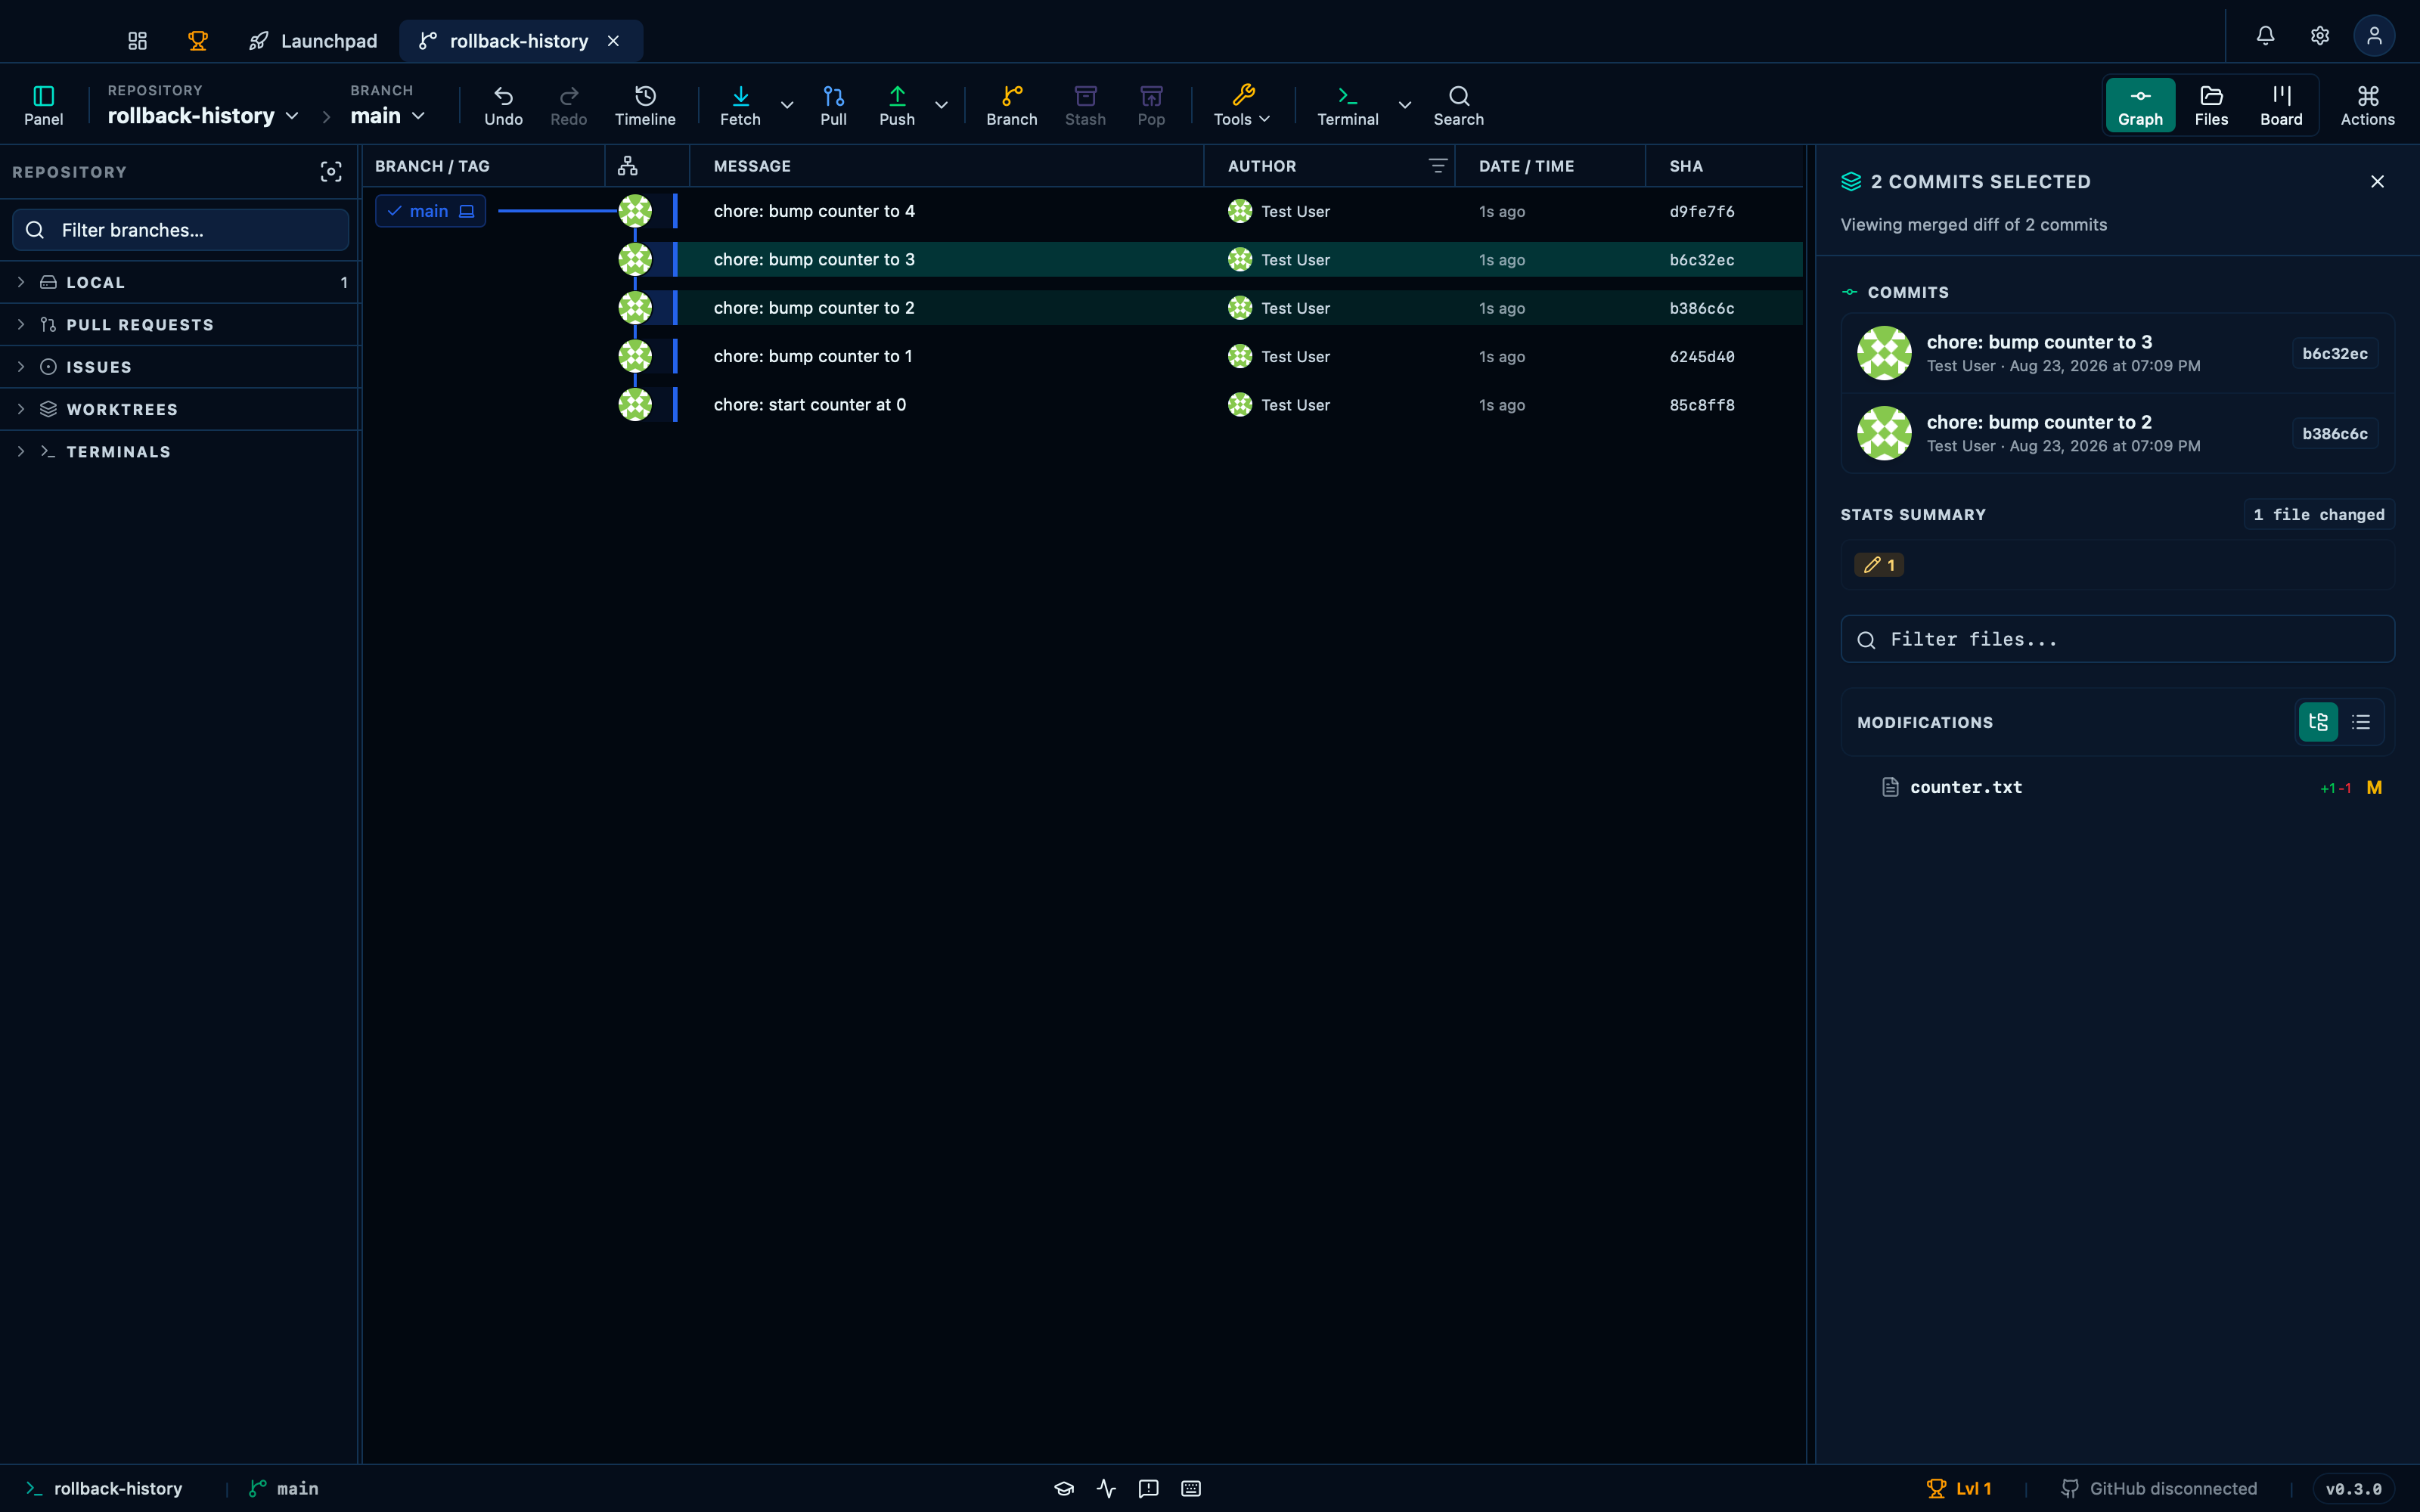
Captured from the running app by this scenario.
Do this
- Select the
HEAD~2commit in the graph - Add the
HEAD~1commit to the graph selection
You should see
- The multi-commit panel shows 2 commits selected
- The multi-commit panel lists
counter.txtas a changed file
Opening a commit on GitHub, resolved from the repository's own remote
Every commit's palette entry offers a link to that same commit on GitHub — resolved from the repository's own "origin" remote rather than a separate setup step. Nothing configured (or configured to somewhere that isn't GitHub) surfaces a clear error instead of a dead click; a real GitHub remote turns the same entry into the exact commit's page.
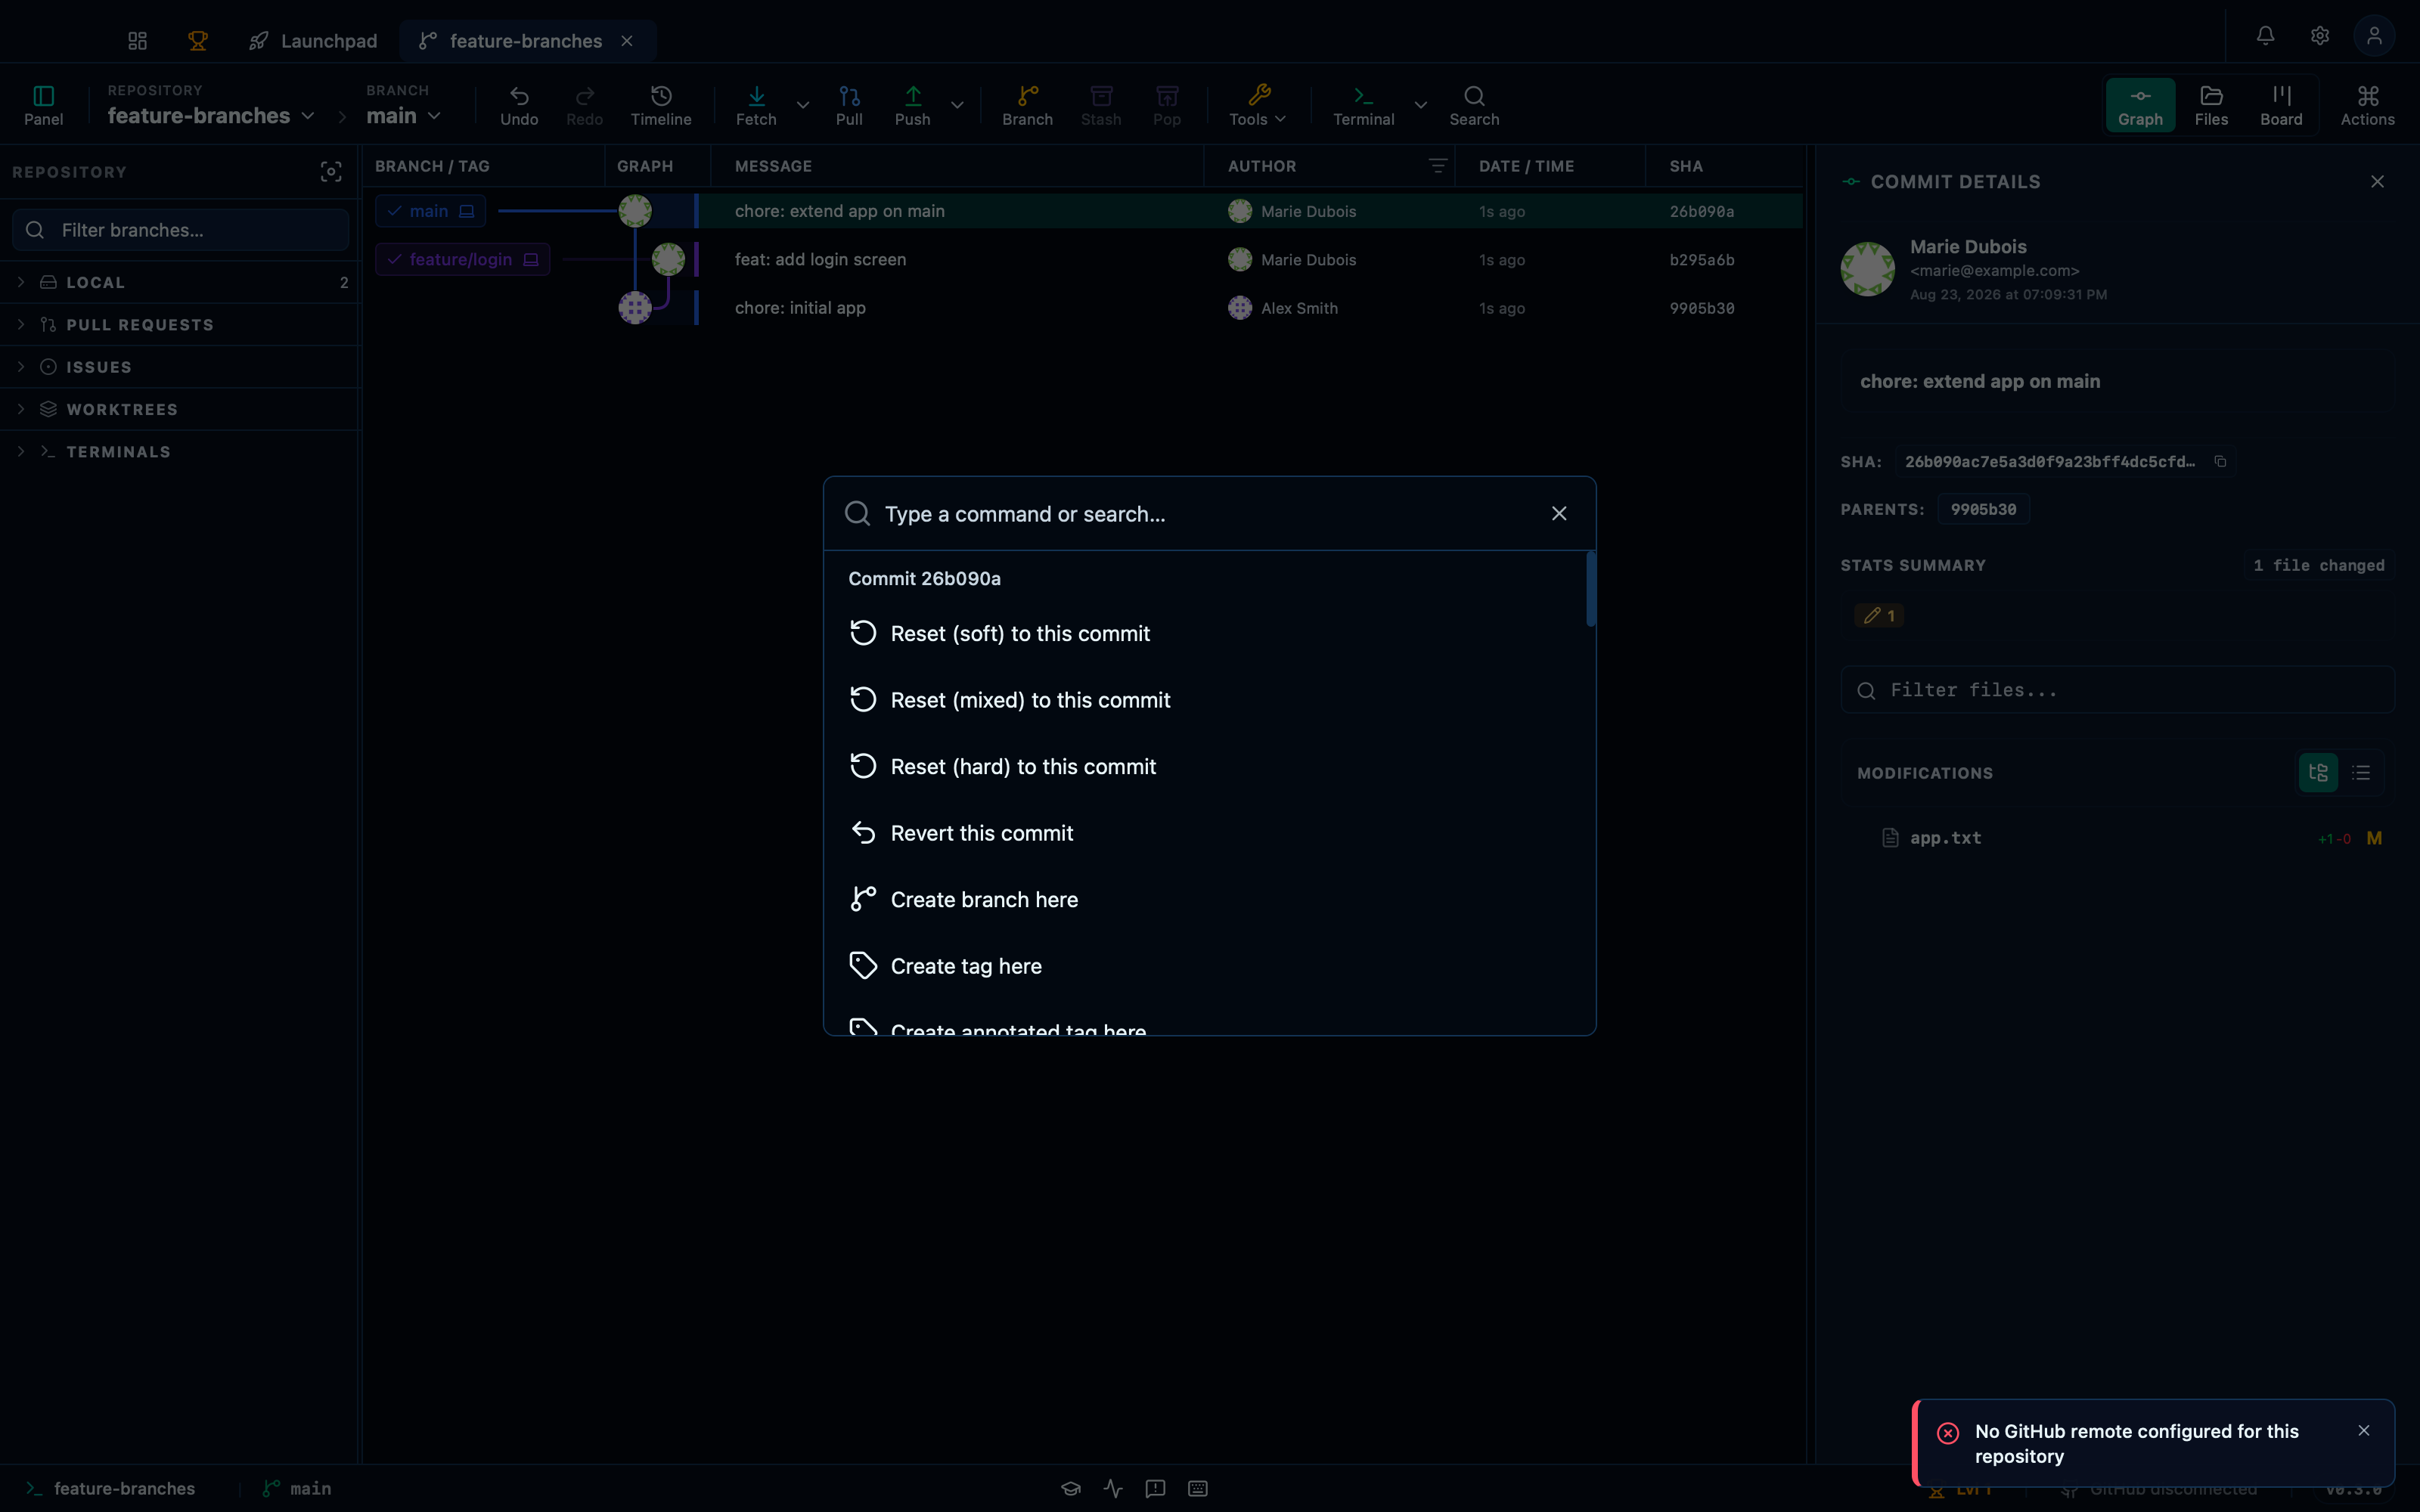
Captured from the running app by this scenario.
Do this
- Select the newest commit in the graph
- Open the command palette
- Pick
Open commit on GitHubfrom the palette - Open the command palette
You should see
- An error notification reading
No GitHub remote configured for this repositoryis displayed - The palette offers
Open commit on GitHub
A commit's linked pull request shows as a badge
A commit whose SHA has a pull request on GitHub gets a badge in its details panel linking straight to it — the PR's number and title, with a distinct icon once it's merged.
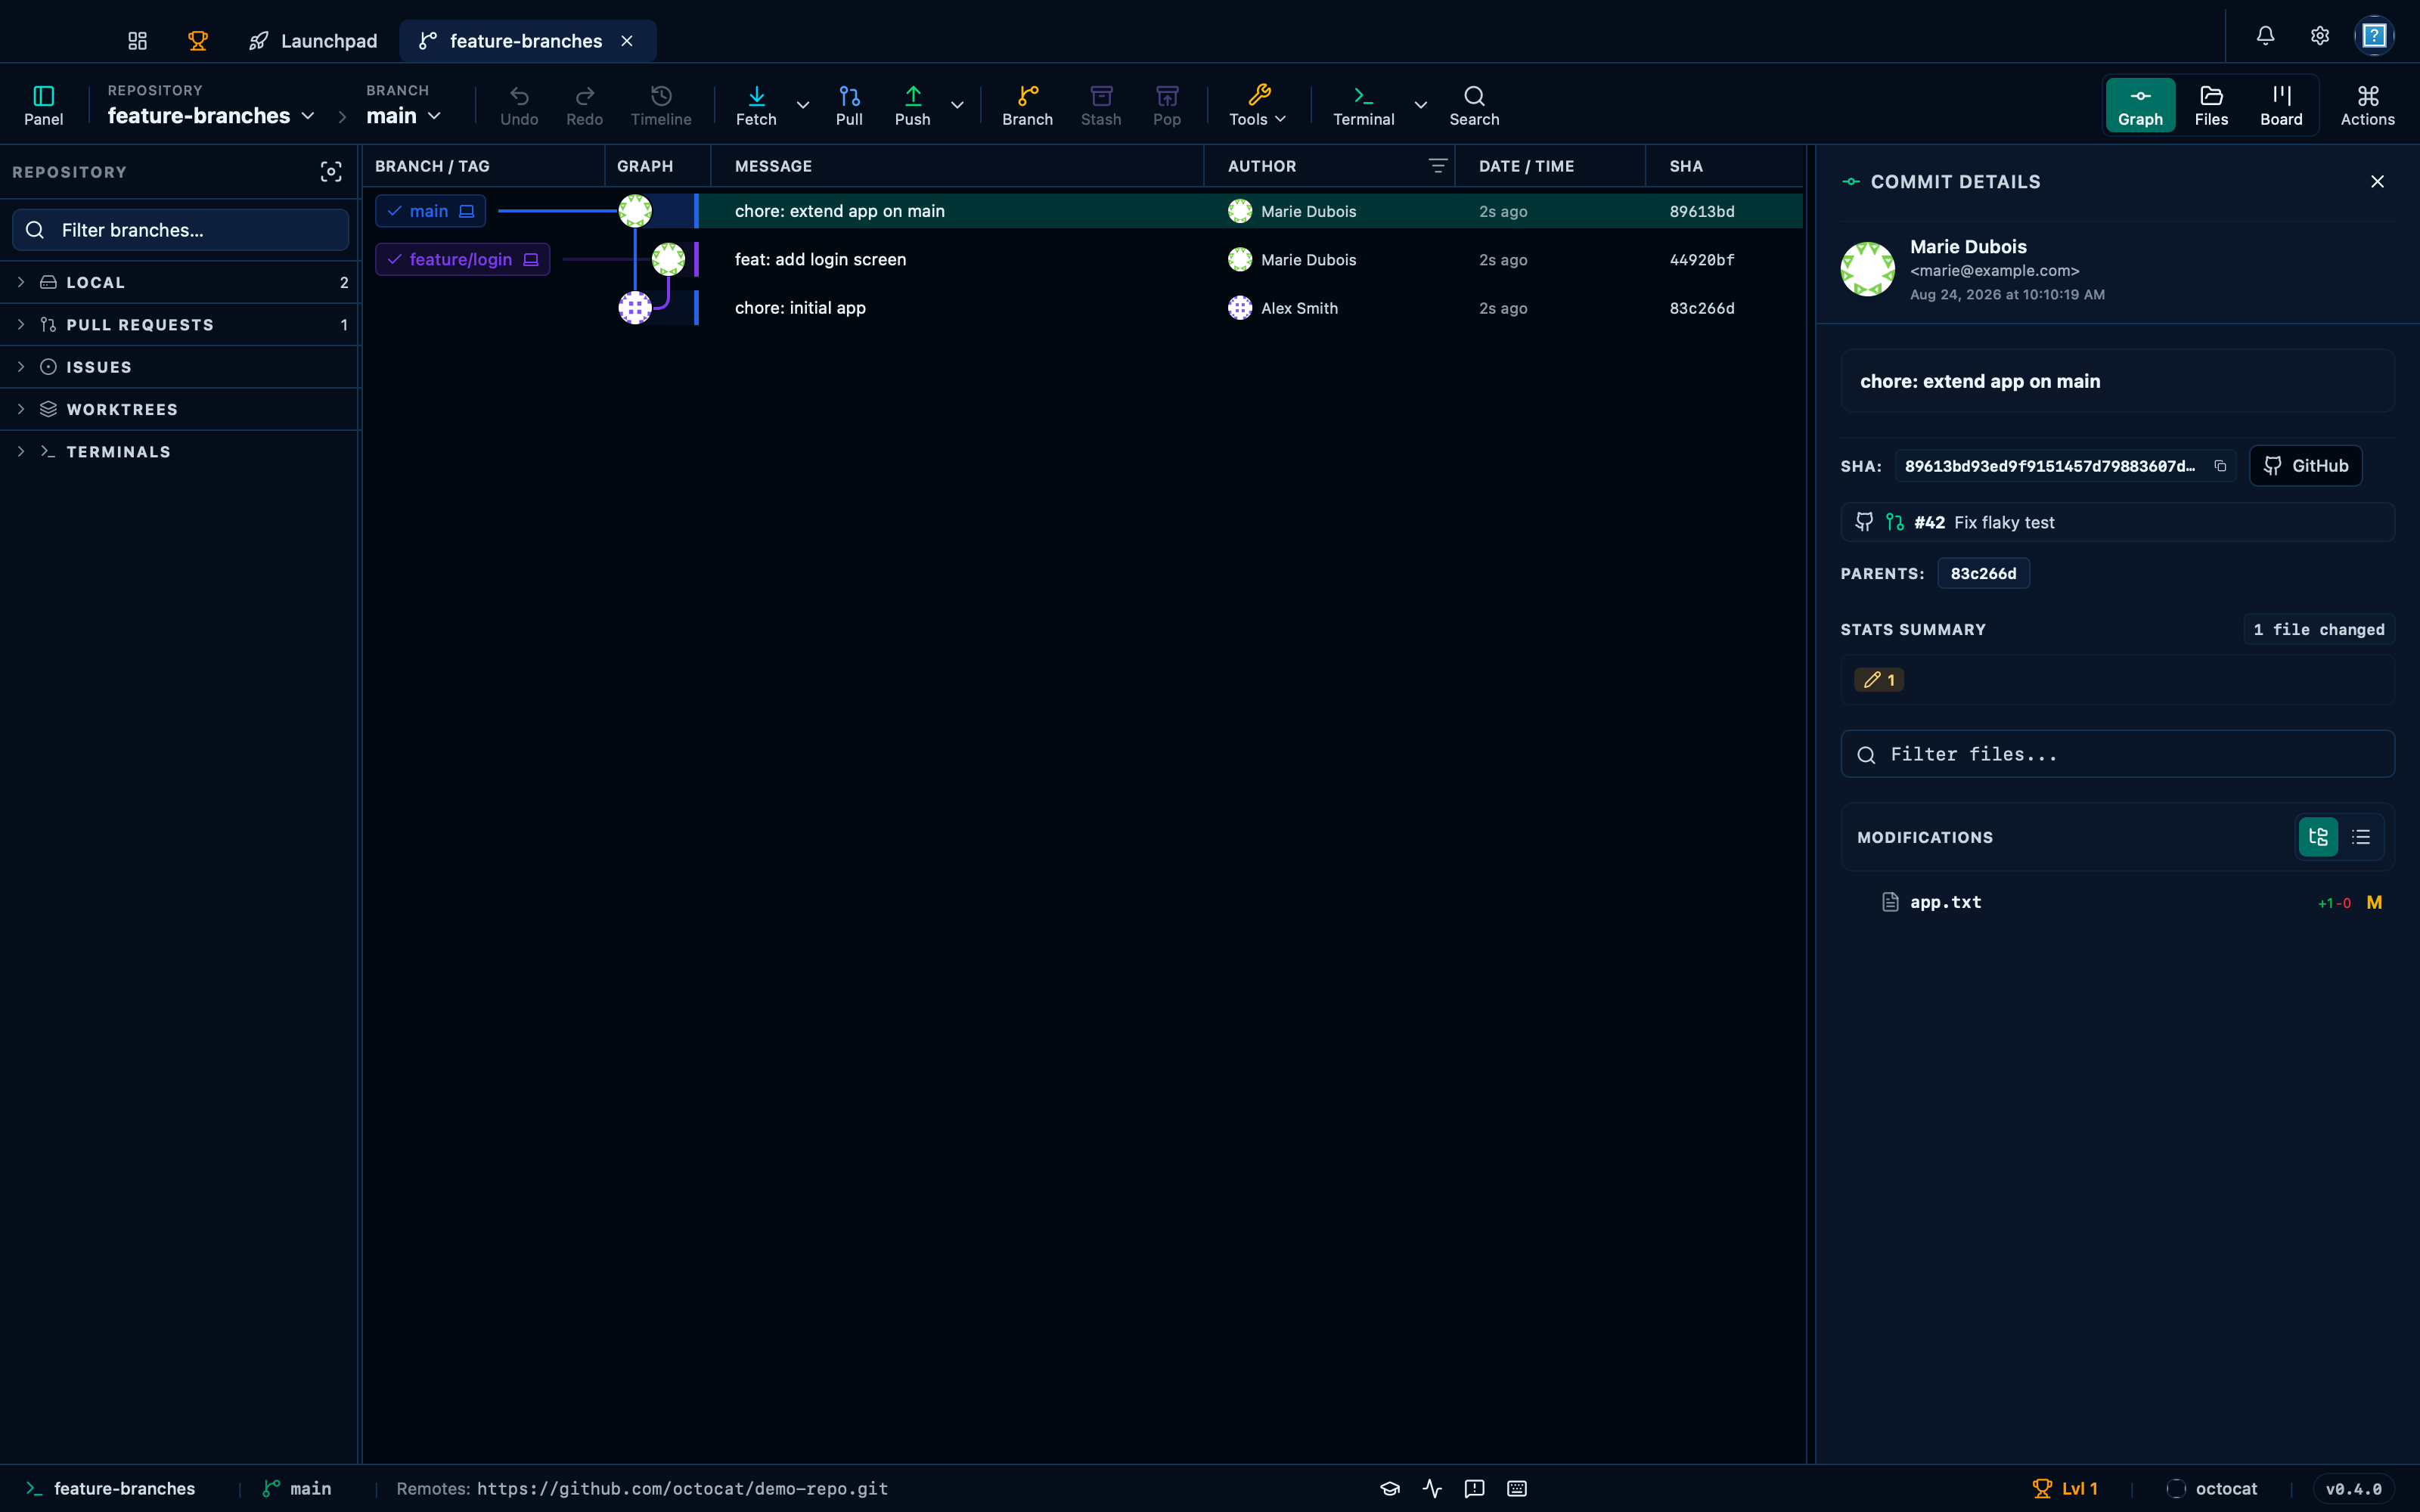
Captured from the running app by this scenario.
Do this
- Select the newest commit in the graph
You should see
- The commit details panel is shown
- The commit's pull request badge shows
#42titledFix flaky test - The commit's pull request badge shows it as open
- No error notification is displayed
Filtering the graph with ⌘F
⌘F opens a small search bar floating over the graph and steps through the commits matching what you type — by subject, body, author name or email, or SHA — without hiding the rest of the history the way a filter would. The counter says which match you're on and how many there are in total; Enter and the arrows step forward, Shift+Enter back.
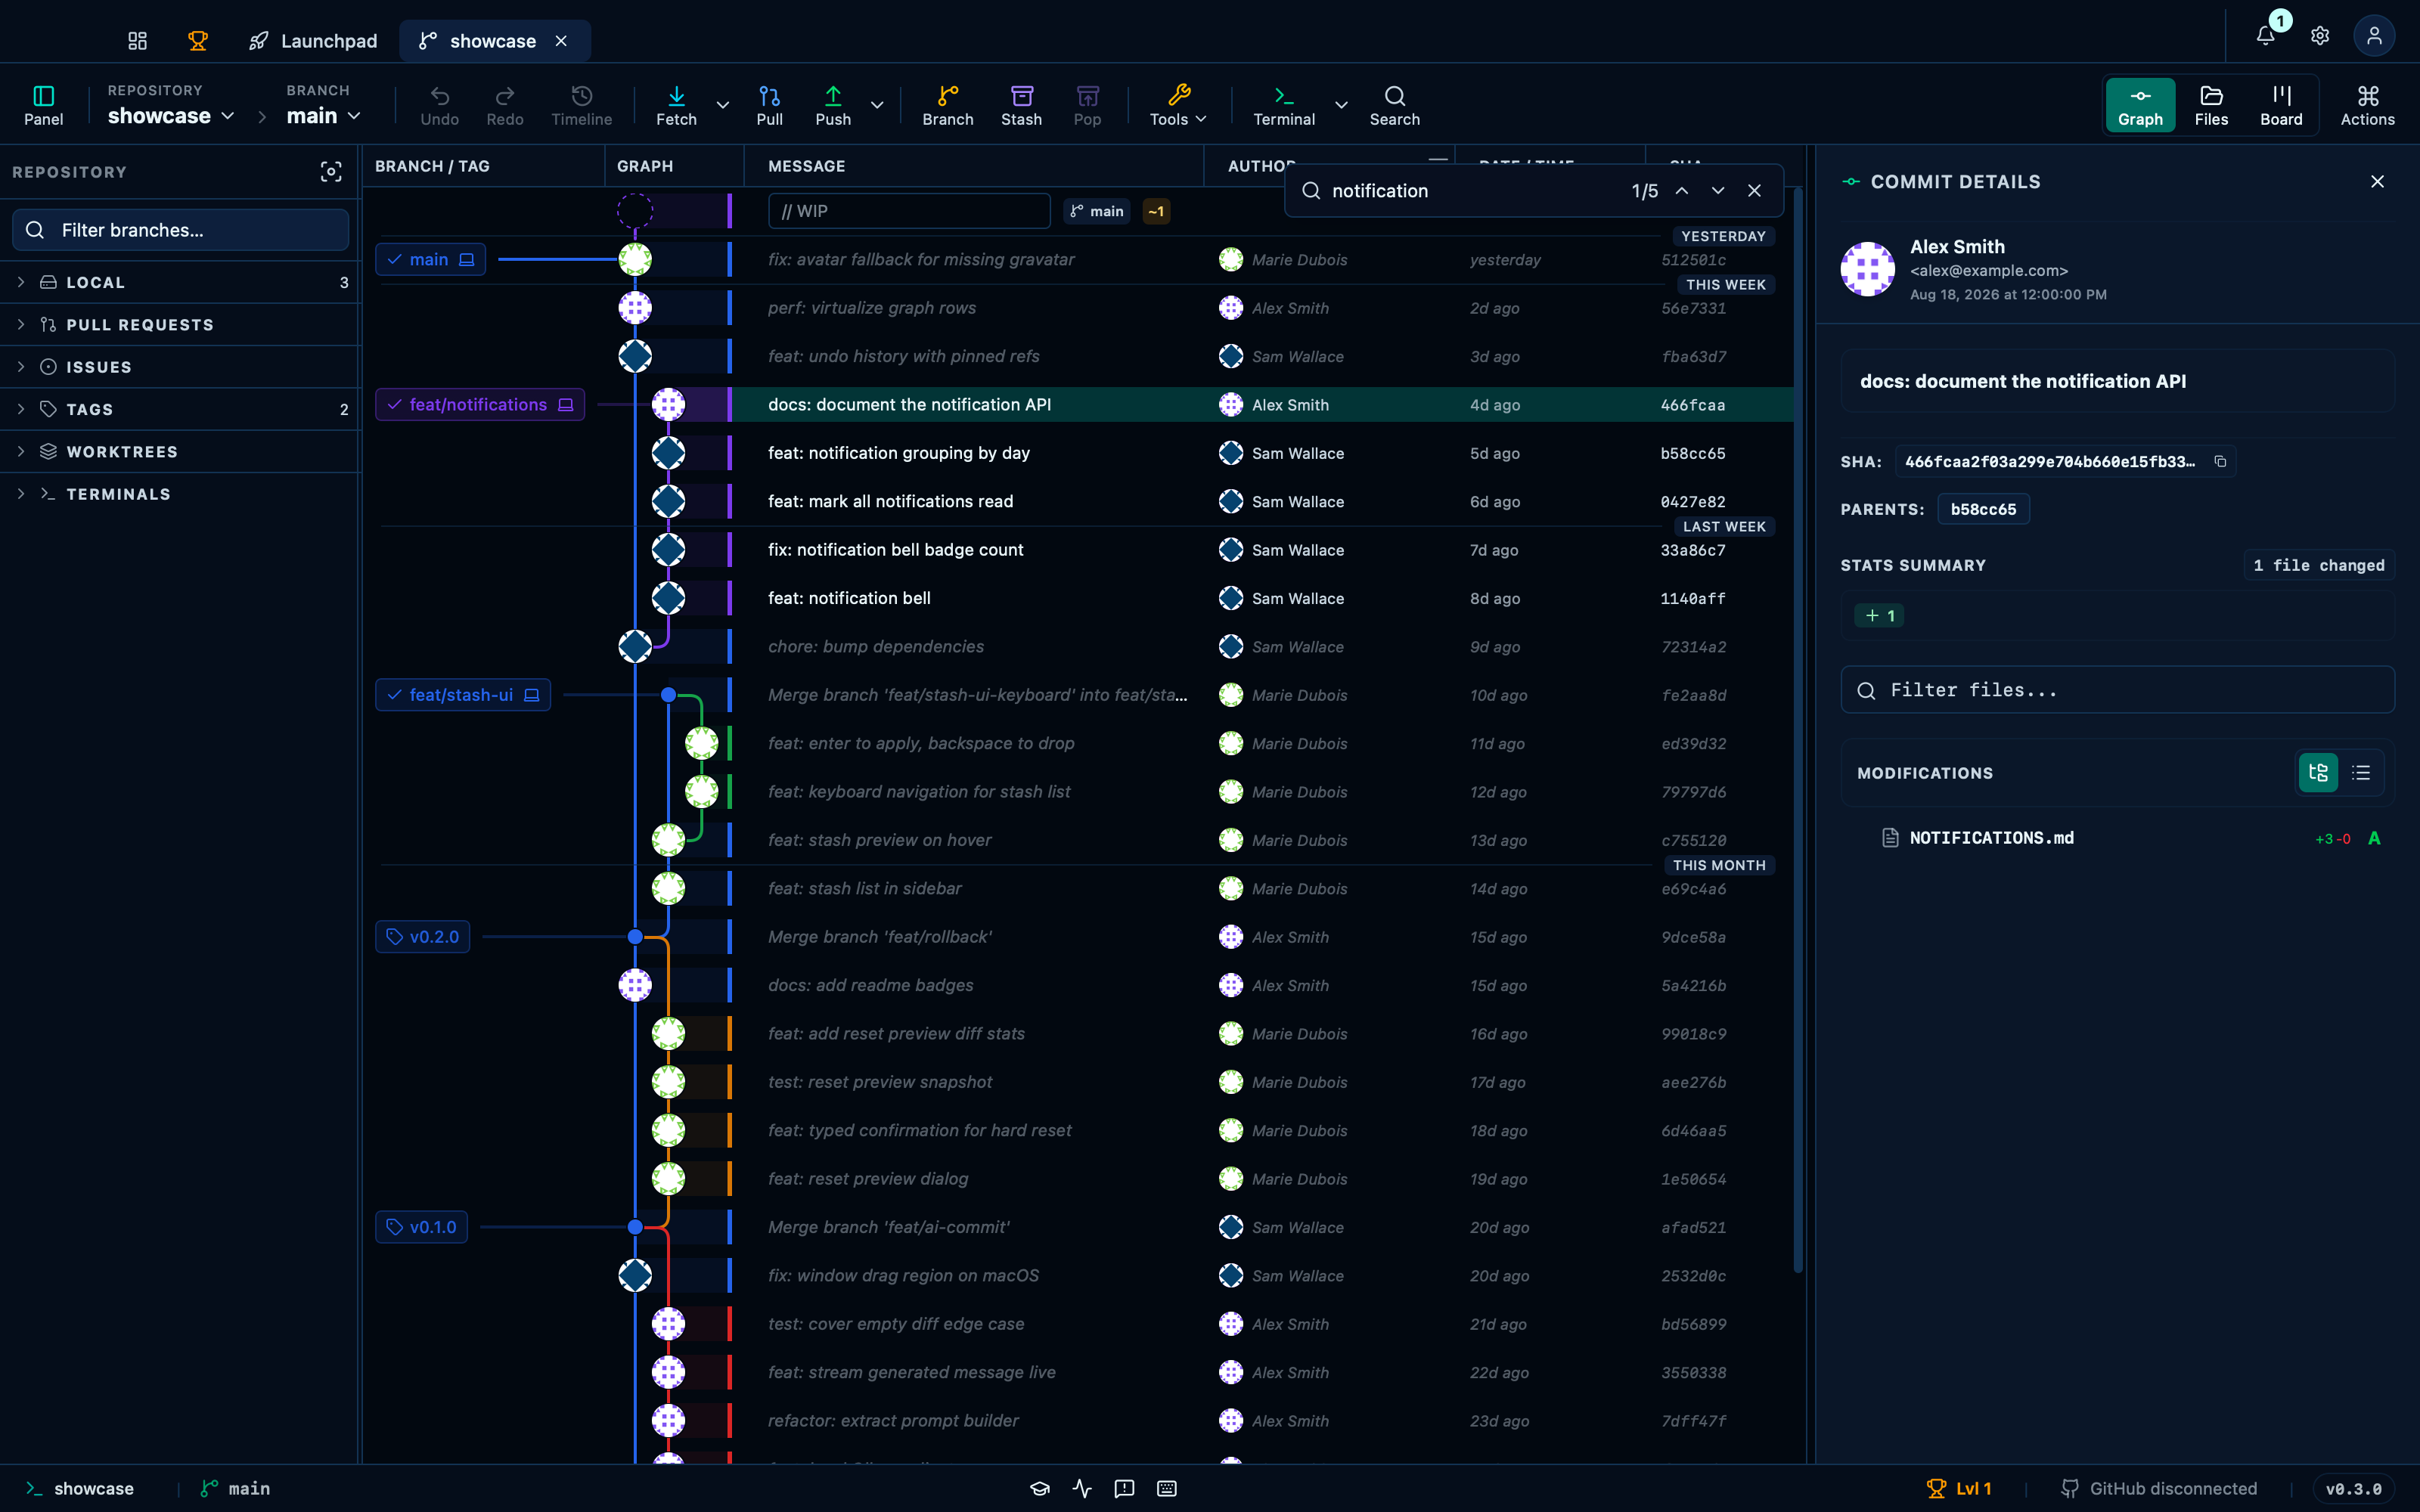
Captured from the running app by this scenario.
Do this
- Open the commit search panel
- Search the commit graph for
notification - Go to the next commit search match
You should see
- The commit search shows
1/5 - The commit search shows
2/5
Filtering the graph by author
The funnel in the Author column header narrows attention to one or more people's own work, without hiding anything else the way ⌘F's search does not either — every commit stays in the graph, and everyone but the selected authors just dims, so the shape of history around their commits is still there to read.
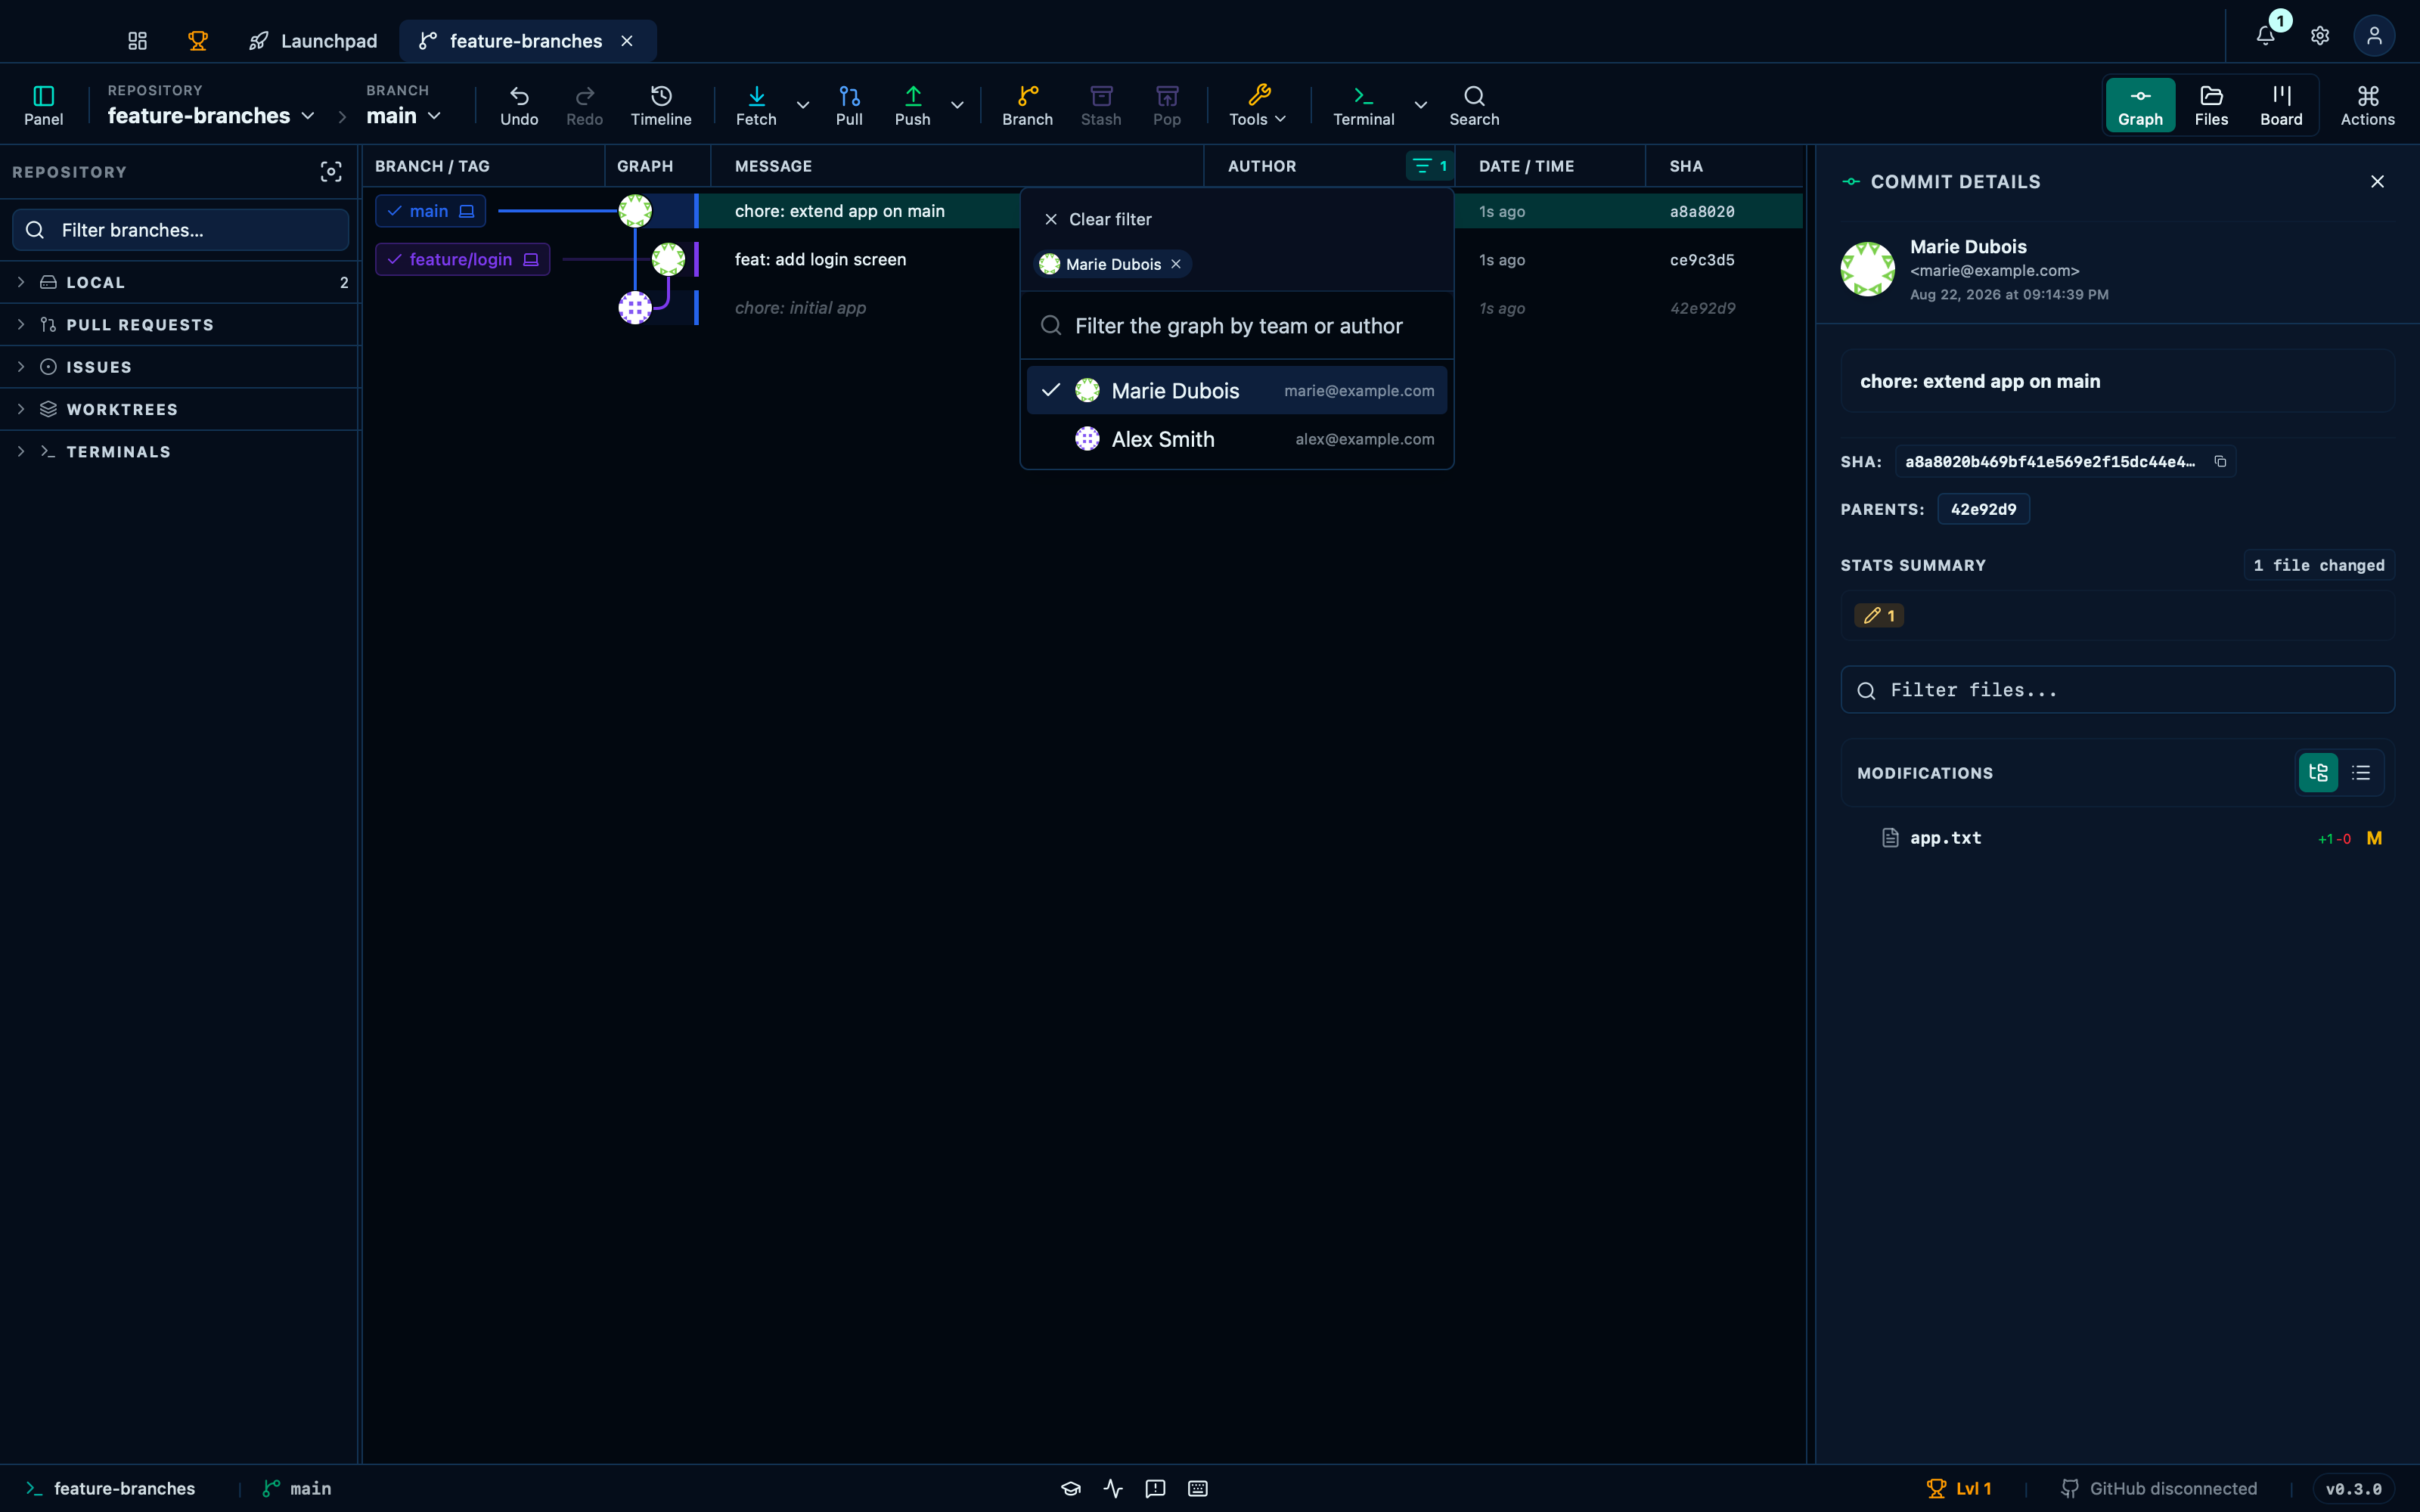
Captured from the running app by this scenario.
Do this
- Open the author filter
- Filter the graph by author
Marie Dubois - Clear the author filter
You should see
- The author filter shows
1selected - The commit
chore: extend app on mainis not dimmed - The commit
chore: initial appis dimmed - The commit
chore: initial appis not dimmed
This page is generated from apps/e2e/features/commit-graph.feature, the end-to-end test that drives the feature it describes.